How to Lay a Gravel Driveway – 3 Steps to Follow
Do you want a durable, low-maintenance surface that can withstand heavy vehicles and foot traffic? If so, a gravel driveway can be an excellent choice for homeowners.
Are you now considering laying a gravel driveway? To do so, you’ll need to follow a few essential steps to ensure it is installed correctly and lasts for years to come.
In this article, I will explain how to lay a gravel driveway, covering planning and preparation, the materials and tools required, the installation process, and maintenance tips.
So, without further delay, let’s move on to the main section.
How to Create a Gravel Driveway
Now, we come to the key section – how to lay a gravel driveway in the UK. There are three main steps to follow. I will explain each one in detail so you can achieve the best results.
Step 1: Planning and Preparation
Before you begin laying your gravel driveway, you must plan and prepare the area. I recommend starting by determining the size and shape of your driveway, measuring the area, and calculating the amount of gravel required.
You also need to establish the depth of the gravel layer. Bear in mind that this will depend on the size and weight of the vehicles that will be using the driveway.
Once you have a clear idea of the dimensions, you should remove any existing vegetation or debris. Next, grade the area to ensure proper drainage. This will help prevent water from pooling on the driveway and causing long-term damage.
Step 2: Materials and Tools Required
To lay a gravel driveway, you will need several materials and tools. The most important material, of course, is gravel.
You will also require landscaping fabric to prevent weed growth, edging material to keep the gravel in place, and fines (smaller gravel particles) to create a smoother surface.
As for tools, you will need a shovel, rake, wheelbarrow, plate compactor or hand tamper, and a level.
Step 3: Installation Process
Now that you have prepared the area and gathered the necessary materials and tools, it is time to begin laying your gravel driveway. This is the most critical step.
Start by laying down the landscaping fabric to prevent weed growth. Then, add a layer of gravel and use a plate compactor or hand tamper to compact it. Repeat this process with additional layers until you have reached the desired depth.
A gravel driveway should typically be at least 4 inches deep. However, you may need to adjust this depending on the weight of your vehicle.
Once you have added the final layer of gravel, it is time to install the edging material. This will help keep the gravel contained and prevent it from spreading onto your lawn or flower beds. Finally, if you want a smoother surface, you can add a layer of fines on top of the gravel and compact it.
Congratulations – you have completed the installation!
However, as you can see, it is a complex process, and it is often best to hire a professional to carry out the work. If you need expert assistance, I recommend P&M Kelly.
How to Keep Gravel in Place on Your Driveway
This is another important aspect to consider. Here are a few ways to ensure your gravel remains in place:
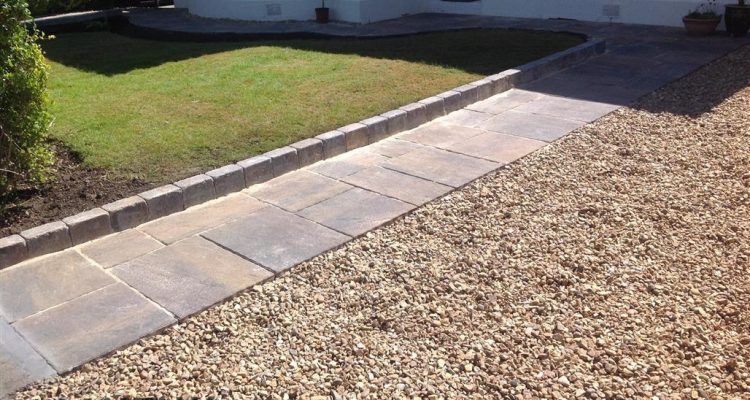
- Install a border – The simplest way to keep gravel contained is to install a border or edging around the driveway. This can be done using plastic, metal, or concrete edging materials.
- Use geotextile fabric – A permeable fabric placed on the ground before adding the gravel can prevent it from sinking into the soil and helps to keep it stable.
- Compact the gravel – Using a compactor machine will pack the gravel tightly, reducing movement and preventing it from shifting.
Maintenance Guide for a Gravel Driveway
Here are some essential tips for maintaining a gravel driveway:
- Regularly remove debris – Leaves, twigs, and rocks can accumulate and damage the surface. Use a rake or leaf blower to clear debris regularly.
- Fill in potholes and ruts – Over time, potholes and ruts can develop. These should be filled in promptly using gravel of the same size and colour as the existing driveway, then compacted with a shovel or hand tamper.
- Address drainage issues – Poor drainage can lead to erosion and surface damage. Check that water is being directed away from your property and improve drainage if necessary.
- Regrade the surface – Levelling the driveway periodically can help to smooth out any uneven areas.
- Top up with gravel – Over time, gravel may become compacted and require replenishment. Adding a fresh layer when needed will help maintain a level and smooth surface.
- Limit heavy vehicle use – Heavy vehicles such as lorries and trailers can cause significant damage. Where possible, limit their use on your driveway.
- Avoid harsh chemicals – Never use harsh chemicals, such as de-icing salts, as they can damage the gravel. Instead, use sand or grit to improve traction in icy conditions.
Final Thoughts
I hope you now feel confident about how to lay a gravel driveway.
This guide has covered all the essential steps, from planning and preparation to installation and maintenance. There are only three main steps to follow, but be particularly careful with the final one to ensure durability.
Additionally, I have included a maintenance guide to help you prolong the lifespan of your driveway. By following these tips, you can keep your gravel driveway in excellent condition for years to come.